
PETG is the dominant resin for premium cosmetic bottles produced on one-step ISBM machines — chosen for its water-white transparency, excellent chemical resistance to fragrance ingredients, and the thick-walled geometries that premium brands demand. Yet PETG is also the resin with the narrowest processing tolerance of any common ISBM material: a moisture content 0.02% above the drying limit causes irreversible haze; a melt temperature 15°C too high causes yellowing; a stretch rod speed set too aggressively causes stress whitening at the shoulder. This guide provides a complete, parameter-by-parameter setup reference for PETG on HGY-series ISBM machines — covering drying, barrel temperature profile, injection parameters, blow parameters, mold temperatures and stretch rod speed, with startup sequence and common defect corrections.
1. Why PETG Behaves Differently from PET on ISBM Machines
PETG (glycol-modified polyethylene terephthalate) differs from standard PET in one structurally important way: the glycol modification disrupts the regular chain geometry that allows PET to crystallise under orientation. Where PET undergoes strain-induced crystallisation during stretch blowing — a self-reinforcing mechanism that increases stiffness and produces the characteristic “clink” of a PET bottle — PETG remains amorphous throughout the process. This has three practical consequences for ISBM setup:
- ▶Lower processing temperature: PETG softens at a lower temperature than PET (Tg approximately 80°C vs 75°C, but with different melt flow behaviour) and degrades at a lower ceiling. The practical barrel temperature window for PETG is 240–265°C — 25 to 30°C below PET. Exceeding 270°C even briefly causes chain scission and visible yellowing.
- ▶Narrower stretch ratio window: PETG does not strain-harden the way PET does — it lacks the self-correcting mechanism that naturally distributes material in PET bottles. This means PETG preform design must be more precise, stretch ratios must be more conservative, and shoulder geometry must be controlled more carefully to avoid stress whitening.
- ▶Higher moisture sensitivity: PETG absorbs atmospheric moisture more readily than PET and degrades hydrolytically at lower moisture levels. The maximum acceptable moisture content before processing is 0.04% for PETG vs 0.005% for PET — but the time to reach that threshold from dry is shorter, making hopper management critical in humid environments.
The PETG advantage in cosmetics: Despite its narrower processing window, PETG is the preferred resin for premium cosmetic packaging because it achieves near-zero haze at thicker wall sections where PET would develop crystalline opacity. A 3mm-wall PETG bottle can achieve haze below 1.5%; an equivalent PET bottle at the same wall thickness would require careful annealing to avoid the crystalline haze that forms during slow cooling of thick sections.
2. Step 1 — Resin Drying: The Non-Negotiable First Step
Moisture in PETG resin above 0.04% causes hydrolytic chain scission during processing — polymer chains are broken by water molecules at processing temperature, reducing molecular weight and producing volatile by-products that scatter light as haze. This degradation is irreversible: no downstream parameter adjustment can recover a PETG preform produced from wet resin. Correct drying is the single most important step in PETG setup.
2.1 Drying Specification
| Parameter | PETG Specification | Notes |
|---|---|---|
| Dryer type | Dehumidifying hopper dryer | Hot air dryer acceptable in dry climates only (RH < 40%). Desiccant dryer strongly preferred. |
| Drying temperature | 75 – 80°C | Do not exceed 85°C — PETG pellets begin to agglomerate above this temperature, blocking the hopper throat. |
| Minimum drying time | 4 hours (standard) / 6 hours (humid climate) | Measure from when the dryer reaches setpoint temperature, not from when material was loaded. |
| Maximum moisture at processing | < 0.04% | Verify with Karl Fischer titration or capacitance moisture analyser before each production run. |
| Maximum time in hopper after drying | 6 hours | PETG re-absorbs moisture from air. Re-dry if material has been sitting in an open hopper for more than 6 hours. |
| Dryer dew point (desiccant) | −20°C or lower | A desiccant dryer with dew point above −20°C will not achieve adequate moisture removal in less than 8 hours at 80°C. |
2.2 Hopper Management in Production
Maintain the dryer hopper at setpoint temperature continuously during production. Do not add fresh undried pellets directly to a hot hopper containing dried material — the wet pellets will transfer moisture to the surrounding dry material. If production is interrupted for more than 2 hours, reduce the hopper throat gate to minimum to retain heat, and extend drying time by 1 hour for each hour of interruption before resuming production.
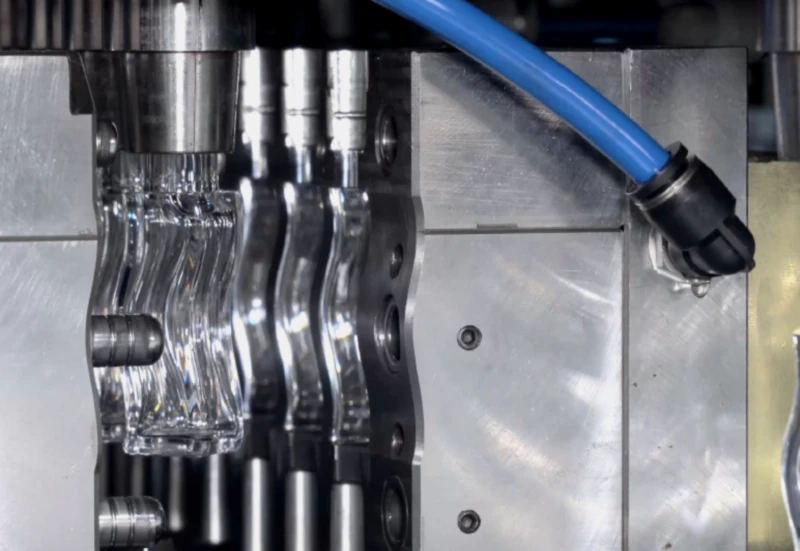
Fig. 1 — PETG preform quality is determined before the resin enters the injection mold. Correctly dried PETG (moisture below 0.04%) produces crystal-clear preforms with no haze. Wet PETG produces haze that is locked into the polymer chain structure — no injection or blow parameter can correct it. Drying is the first and most important PETG setup step.
3. Step 2 — Barrel Temperature Profile
The barrel temperature profile for PETG follows a rising gradient from the rear feed zone to the front nozzle zone. The rear zone must be low enough to avoid premature melting that causes bridging at the feed throat; the front zone must be high enough to ensure complete melt homogeneity while staying below the degradation threshold.
Zone 1 — Rear Feed
210°C
Starting point. Adjust up if feed stalls.
Zone 2 — Mid Rear
230°C
Progressive melting zone.
Zone 3 — Mid
245°C
Main melt zone. Critical for homogeneity.
Zone 4 — Mid Front
250°C
Homogenisation. Monitor for colour shift.
Zone 5 — Front
255°C
Max 260°C. Reduce if yellowing appears.
Nozzle
250°C
Slightly lower than Z5 to prevent drool.
The actual melt temperature measured with a contact probe at the nozzle exit typically reads 5–15°C higher than the nozzle zone setpoint due to shear heating from the screw. For PETG, the target actual melt temperature is 245–262°C. Measure with a contact probe during the first production run — if actual melt temperature exceeds 265°C, reduce Zone 4 and Zone 5 setpoints by 5°C increments.
3.1 Hot Runner Temperature
Hot runner zone temperatures for PETG should be set 5–10°C below the nozzle zone setpoint to minimise residence time degradation in the manifold. Typical hot runner settings for PETG:
- ✓Hot runner manifold body: 240 – 248°C
- ✓Hot runner nozzle tips: 245 – 255°C
- ✓Hot runner temperature imbalance between zones: maximum ±3°C for fill balance
4. Step 3 — Injection Parameters
PETG injection parameters follow a multi-stage profile — a fast fill phase to minimise melt cooling before cavity fill is complete, followed by a slow pack phase that prevents jetting and reduces orientation stress in the gate zone. The holding phase compensates for volumetric shrinkage without over-packing the preform.
Injection Speed
60 – 80%
Phase 1 (fill): 70–80% of max. Phase 2 (pack): reduce to 30–40% when cavity is 85–90% full. PETG is more sensitive to jetting than PET — never use 100% injection speed on phase 1.
Injection Pressure
90 – 140 MPa
Starting point: 110 MPa. Reduce if flash appears at the parting line. Increase if short shots occur in outer cavities of a multi-cavity tool.
Fill Time
1.2 – 2.5 s
For a 10–20g PETG preform. Heavier preforms require proportionally longer fill time. Fill time exceeding 3.0s at normal temperatures indicates a flow restriction — check gate diameter or hot runner nozzle.
Holding Pressure
50 – 70 MPa
Typically 50–65% of injection pressure. Too high: residual stress causes crazing during blow. Too low: sink marks on preform body. Set to the minimum value that eliminates sink marks.
Holding Time
2.0 – 4.5 s
Extend until sink marks disappear, then add 0.5s buffer. Verify gate freeze time by progressive extension — further holding time beyond gate freeze has no effect on preform quality but increases cycle time.
Screw Back Pressure
8 – 15 MPa
PETG requires moderate back pressure for melt homogeneity. Higher than 18 MPa generates excessive shear heat that raises actual melt temperature above the safe window. Start at 10 MPa and adjust based on preform clarity.
Screw Speed
80 – 120 RPM
Keep below 130 RPM for PETG — higher screw speed generates shear heat that cumulatively raises melt temperature. Target screw recovery time of 70–85% of the cycle time to ensure adequate cooling before next injection.
Decompression
3 – 6 mm
Suck-back after screw recovery prevents nozzle drool. PETG at 250°C has lower viscosity than PET and is more prone to drooling — set decompression at the minimum value that prevents cold slug formation in the next shot.
Injection Cooling Time
3.0 – 6.0 s
Time from end of holding to mold open. The neck ring zone must reach below 80°C before transfer. On 4-station machines, reduce toward minimum to retain preform body heat for the blow station. On 3-station machines, use the lower end with caution.
5. Step 4 — Mold Temperature Settings
Mold temperature in ISBM serves two simultaneous and opposing objectives: cool the preform enough to solidify the neck geometry completely before transfer, while retaining enough heat in the preform body to allow effective stretch blowing at the next station. Getting this balance right is more critical for PETG than for PET, because PETG has a narrower temperature window between “too cold to stretch” and “too soft to hold neck geometry.”
| Mold Zone | PETG Target | Function | Symptom if Wrong |
|---|---|---|---|
| Neck ring (cooling water) | 6 – 12°C | Freeze neck geometry before transfer | Neck distortion, out-of-round thread |
| Preform cavity (core pin) | 10 – 18°C | Solidify preform outer skin only | Too cold: preform too stiff for blow. Too warm: preform collapses |
| Conditioning station (4-station) | 80 – 95°C | Equalise preform temperature profile | Uneven wall, stress whitening at shoulder |
| Blow mold (cooling water) | 10 – 18°C | Cool bottle to below distortion temp | Too warm: body distortion after ejection. Too cold: extended cycle time |
4-station advantage for PETG: The conditioning station on a 4-station HGY150-V4 or HGY150-V4-EV machine holds the PETG preform at 80–95°C for 1.5–3.0 seconds, allowing the internal preform temperature to equalise before blowing. On a 3-station machine without this step, the preform arrives at the blow station with a steep temperature gradient (hot core, cooler skin), making it significantly harder to achieve uniform wall thickness in thick-walled PETG bottles. For PETG cosmetic bottles with walls above 2mm, a 4-station machine is strongly preferred.
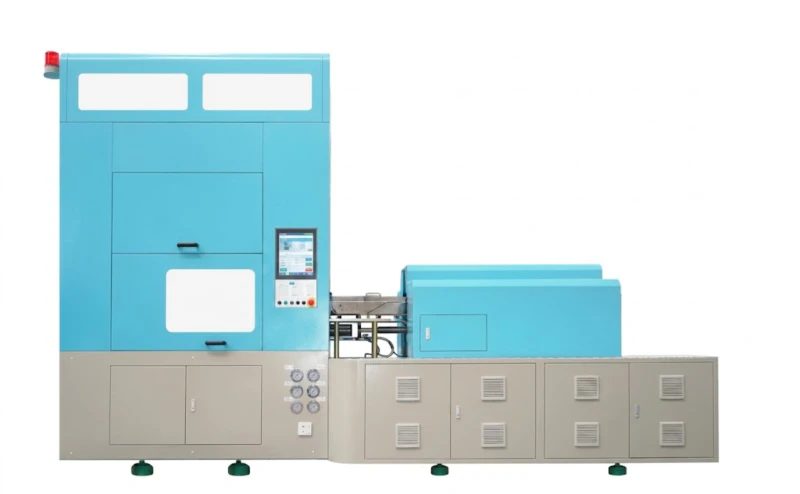
Fig. 2 — The HGY150-V4-EV injection unit (right) with barrel temperature zone controllers. The 4-station rotary table (centre) includes the conditioning station that equalises PETG preform temperature before blowing — the single most important machine capability for achieving consistent wall thickness in thick-walled PETG cosmetic bottles.
6. Step 5 — Blow Parameters and Stretch Rod Speed
The blow phase for PETG requires careful control of three sequential events: pre-blow (low-pressure air to initiate radial expansion before the stretch rod completes axial extension), main blow (full pressure to force the preform against the mold cavity), and hold (sustained pressure while the bottle cools). The timing relationship between stretch rod travel and pre-blow air initiation is the most sensitive parameter in the entire PETG setup.
| Blow Parameter | PETG Range | Starting Point | Effect if Too High / Too Low |
|---|---|---|---|
| Pre-blow pressure | 0.5 – 1.2 MPa | 0.8 MPa | Too high: locks preform before axial stretch complete — thick base. Too low: preform collapses on rod. |
| Main blow pressure | 2.0 – 3.2 MPa | 2.5 MPa | Too low: short blow, flat panels. Too high (above 3.5 MPa): no benefit for PETG, adds compressor load. |
| Blow time | 0.8 – 1.8 s | 1.2 s | Minimum time to achieve full cavity contact. Increase by 0.2s if short blow persists at correct pressure. |
| Hold pressure time | 1.5 – 4.0 s | 2.5 s | Too short: bottle springs back slightly on ejection, oval cross-section. Increase until bottle OD is stable. |
| Stretch rod speed | 1.2 – 1.8 m/s | 1.4 m/s | Too fast: stress whitening at shoulder (PETG cannot orient fast enough). Too slow: base haze from cooling before orientation. |
| Blow cooling time | 2.0 – 5.0 s | 3.0 s | Minimum time to cool below distortion temperature (approximately 65°C for PETG at 10°C mold temp). Reduce only if body dimensions are confirmed stable at ejection. |
Stretch rod speed and PETG stress whitening: Stretch rod speed is the parameter most commonly responsible for shoulder stress whitening in PETG. The optimal speed for PETG is 1.3–1.6 m/s — faster than this, the polymer chains at the shoulder cannot orient quickly enough and craze instead. On HGY series machines with servo-controlled stretch rod, reduce speed in 0.1 m/s increments if stress whitening appears at the shoulder. A stable oil-free air compressor for ISBM is also essential — pressure fluctuation during pre-blow causes the preform to expand unevenly before the rod has completed axial travel, which concentrates local stretch at the shoulder and mimics the stress whitening pattern caused by excessive rod speed.
7. Step 6 — Startup Sequence and First Article
PETG startup requires a disciplined sequence. Rushing any step — particularly barrel soak time and mold warm-up — produces the first 50–100 cycles at degraded clarity that contaminates product inventory and wastes resin.
-
1Verify drying (T−30 min before startup)Measure moisture content. If above 0.04%, do not start — extend drying and re-measure. Do not estimate or skip this check.
-
2Heat barrel to setpoints — soak 30 minutesAfter all zones reach setpoint, soak for a minimum of 30 minutes before any material is injected. This ensures thermal equilibrium throughout the barrel wall — starting before soak is complete produces the first shots at lower-than-expected melt temperature, causing fill inconsistency.
-
3Run first 3 cycles in manual mode at 60% speedCollect and inspect preforms only — do not blow. Check for: correct gram weight, no sink marks, no haze or colour in the body, no flash at the gate zone. Adjust injection parameters before transitioning to blow station.
-
4Enable blow station — first full cycleRun first 5 full cycles at 70% of target cycle speed. Collect all bottles from each cavity. Measure gram weight, neck dimensions, body OD at three heights, and inspect for haze, stress whitening and base clarity.
-
5Ramp to full speed — save PLC recipeOnce all first-article checks pass, gradually increase to full cycle speed over 5 cycles. When production is stable for 10 consecutive cycles with no rejections, save all parameters as a named PLC recipe for this product. This recipe becomes the reference for all future startups and changeovers.
8. PETG vs PET Parameter Comparison
For teams that run both PETG and PET on the same machine, the following comparison highlights the key parameter differences to change at each product switchover:
| Parameter | PETG | PET | Key Difference |
|---|---|---|---|
| Drying temperature | 75 – 80°C | 160 – 175°C | PETG agglomerates above 85°C — never use PET drying temp |
| Barrel temperature (mid) | 245 – 255°C | 270 – 285°C | Running PETG at PET temp causes immediate yellowing |
| Max moisture at processing | 0.04% | 0.005% | PET is stricter — but PETG degrades faster once limit is exceeded |
| Stretch rod speed | 1.2 – 1.8 m/s | 1.5 – 2.5 m/s | PETG stress-whitens at rod speeds that PET handles without issue |
| Optimal axial stretch ratio | 2.0 – 3.0x | 2.5 – 3.5x | PETG window is narrower and shifted lower |
| Blow mold temperature | 10 – 18°C | 8 – 15°C | PETG distorts at slightly higher temperature — needs slightly warmer mold |
| Strain hardening | None — amorphous | Strong — self-correcting | PETG requires more precise preform design to achieve uniform walls |
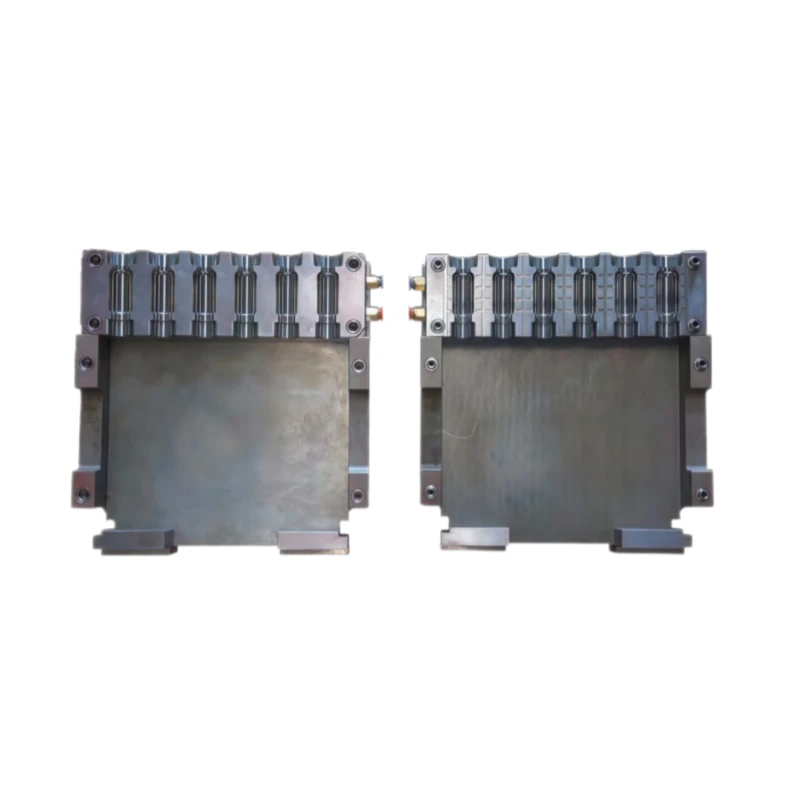
Fig. 3 — ISBM preform mold (left) and blow mold (right) for a PETG cosmetic bottle. The dimensional relationship between these two tools — which determines stretch ratios — must be designed specifically for PETG’s narrower orientation window. A mold set designed for PET and re-used with PETG will almost always produce stress whitening at the shoulder because the higher stretch ratios exceed PETG’s orientation limit.
9. PETG-Specific Defects and Parameter Corrections
The following defects occur specifically — or disproportionately — in PETG production compared to PET, and each has a specific parameter correction:
10. Thick-Wall Cosmetic Bottles: Additional Considerations
Premium cosmetic bottles with wall thickness above 2.5mm require additional process adjustments beyond the standard PETG parameter set. The thick preform wall creates a large thermal mass that behaves differently from standard thin-wall packaging bottles during both injection and blow stages.
- ▶Longer injection cooling time: Thick preforms require 4–8 seconds of injection cooling (vs 3–4 seconds for standard walls) to solidify the outer skin adequately. Insufficient cooling causes the neck to deform during transfer even if the neck ring is adequately cooled.
- ▶Extended conditioning time on 4-station machines: Thick preforms need 2.5–4.0 seconds at the conditioning station to achieve temperature equalisation — the core of a 5mm-wall preform remains 30–40°C hotter than the skin immediately after injection. Inadequate conditioning produces a thick, unoriented base with a thin, over-stretched body.
- ▶Reduced axial and radial stretch ratios: Thick-wall bottles by definition have lower stretch ratios than standard packaging bottles. PETG with BSR below 5x has weaker orientation and is more susceptible to deformation under mechanical stress — accept this limitation as an inherent characteristic of the thick-wall cosmetic bottle geometry, not a process deficiency.
- ▶Longer blow cooling time: A 3mm bottle wall takes approximately 2.5 times longer to cool below distortion temperature than a 1mm wall. Plan for blow cooling times of 4–7 seconds for premium thick-wall formats — accept the longer cycle time as the cost of the geometry.
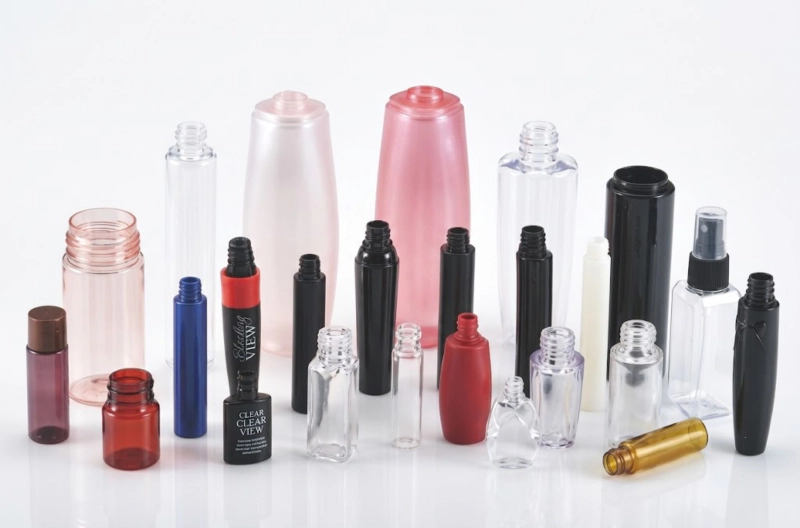
Fig. 4 — Water-white clarity in premium PETG cosmetic bottles, achieved with correctly dried resin (moisture below 0.04%), barrel temperature within the 245–255°C window, stretch rod speed at 1.4 m/s and blow mold cooling at 14°C. Every visible clarity defect in PETG production traces to one of the six setup steps in this guide.
1. Drying is non-negotiable. Moisture above 0.04% produces irreversible haze. Verify with a moisture analyser before every production run — not once per shift, before every run.
2. Never exceed 265°C actual melt temperature. PETG degrades rapidly above this threshold. Measure at the nozzle tip with a contact probe — controller setpoints are not sufficient.
3. Holding pressure is the minimum that eliminates sink marks. Over-packing PETG creates residual stress that causes crazing during blow. Set to the minimum effective value.
4. Stretch rod speed is the shoulder whitening control. PETG does not strain-harden — it whitens. Reduce rod speed in 0.1 m/s steps at the first sign of shoulder stress whitening.
5. Save a PLC recipe for every product. PETG has too many interdependent parameters to set manually. A verified recipe eliminates setup time and startup scrap on every subsequent run.
6. A 4-station machine is the correct platform for thick-wall PETG. The conditioning station is not optional for preforms above 3mm wall — it is the mechanism that makes uniform thick-wall PETG possible at all.
Need PETG Parameter Support for Your ISBM Line?
Send us your bottle specification, preform weight, machine model and the defect you are experiencing. Our engineers will provide a starting parameter set specific to your bottle and resin grade — typically within 24 hours.